I decided that I needed to have some decent sheet lumber storage in my garage because i didn’t want anymore warped wood. So to build this storage I figured the easiest way was to build a jig to make long angle (or taper) cuts in a controlled precise manner.
I gathered up the material needed for the project:
3/4x24x48 MDF sheet
1x4x6 oak board
8x T-Nuts (sometimes called Blind nuts)
3/8 all-thread rod
3/8 nuts
I also used some scrap 1/2 and 1/8 MDF
#6 3/4 Screws
Some of the tools I used:
10″ table saw
12″ Mitre saw
Drill press
Laser cutter
Cordless drill
Air Pin Nailer
Hacksaw
Small file
Hammer

I started by ripping the 3/4 MDF sheet down to ~11″ x 4′ (this didn’t need to be exact because I would be trimming the excess later)
I also ripped a piece of oak 3/8″x3/4″x4′. This is to be the guide that slides in the mitre slot on the table saw.

I then drilled and counter sunk the oak on both sides (this is so when the screw goes in the MFD the oak won’t shift or separate at all. I then glued, tacked and screwed the oak to the MDF board ~4-1/2″ from one side so that when the jig was placed in either mitre slot the edge of the MDF would be at the saw blade. I let this dry for several hours.
I then ran the the jig through the table saw to trim up the edges thus having the saw blade at the very edge of the jig. The next step I took was measuring 1 1/2″ from the center guide and drilling and countersinking holes for the T-nuts.
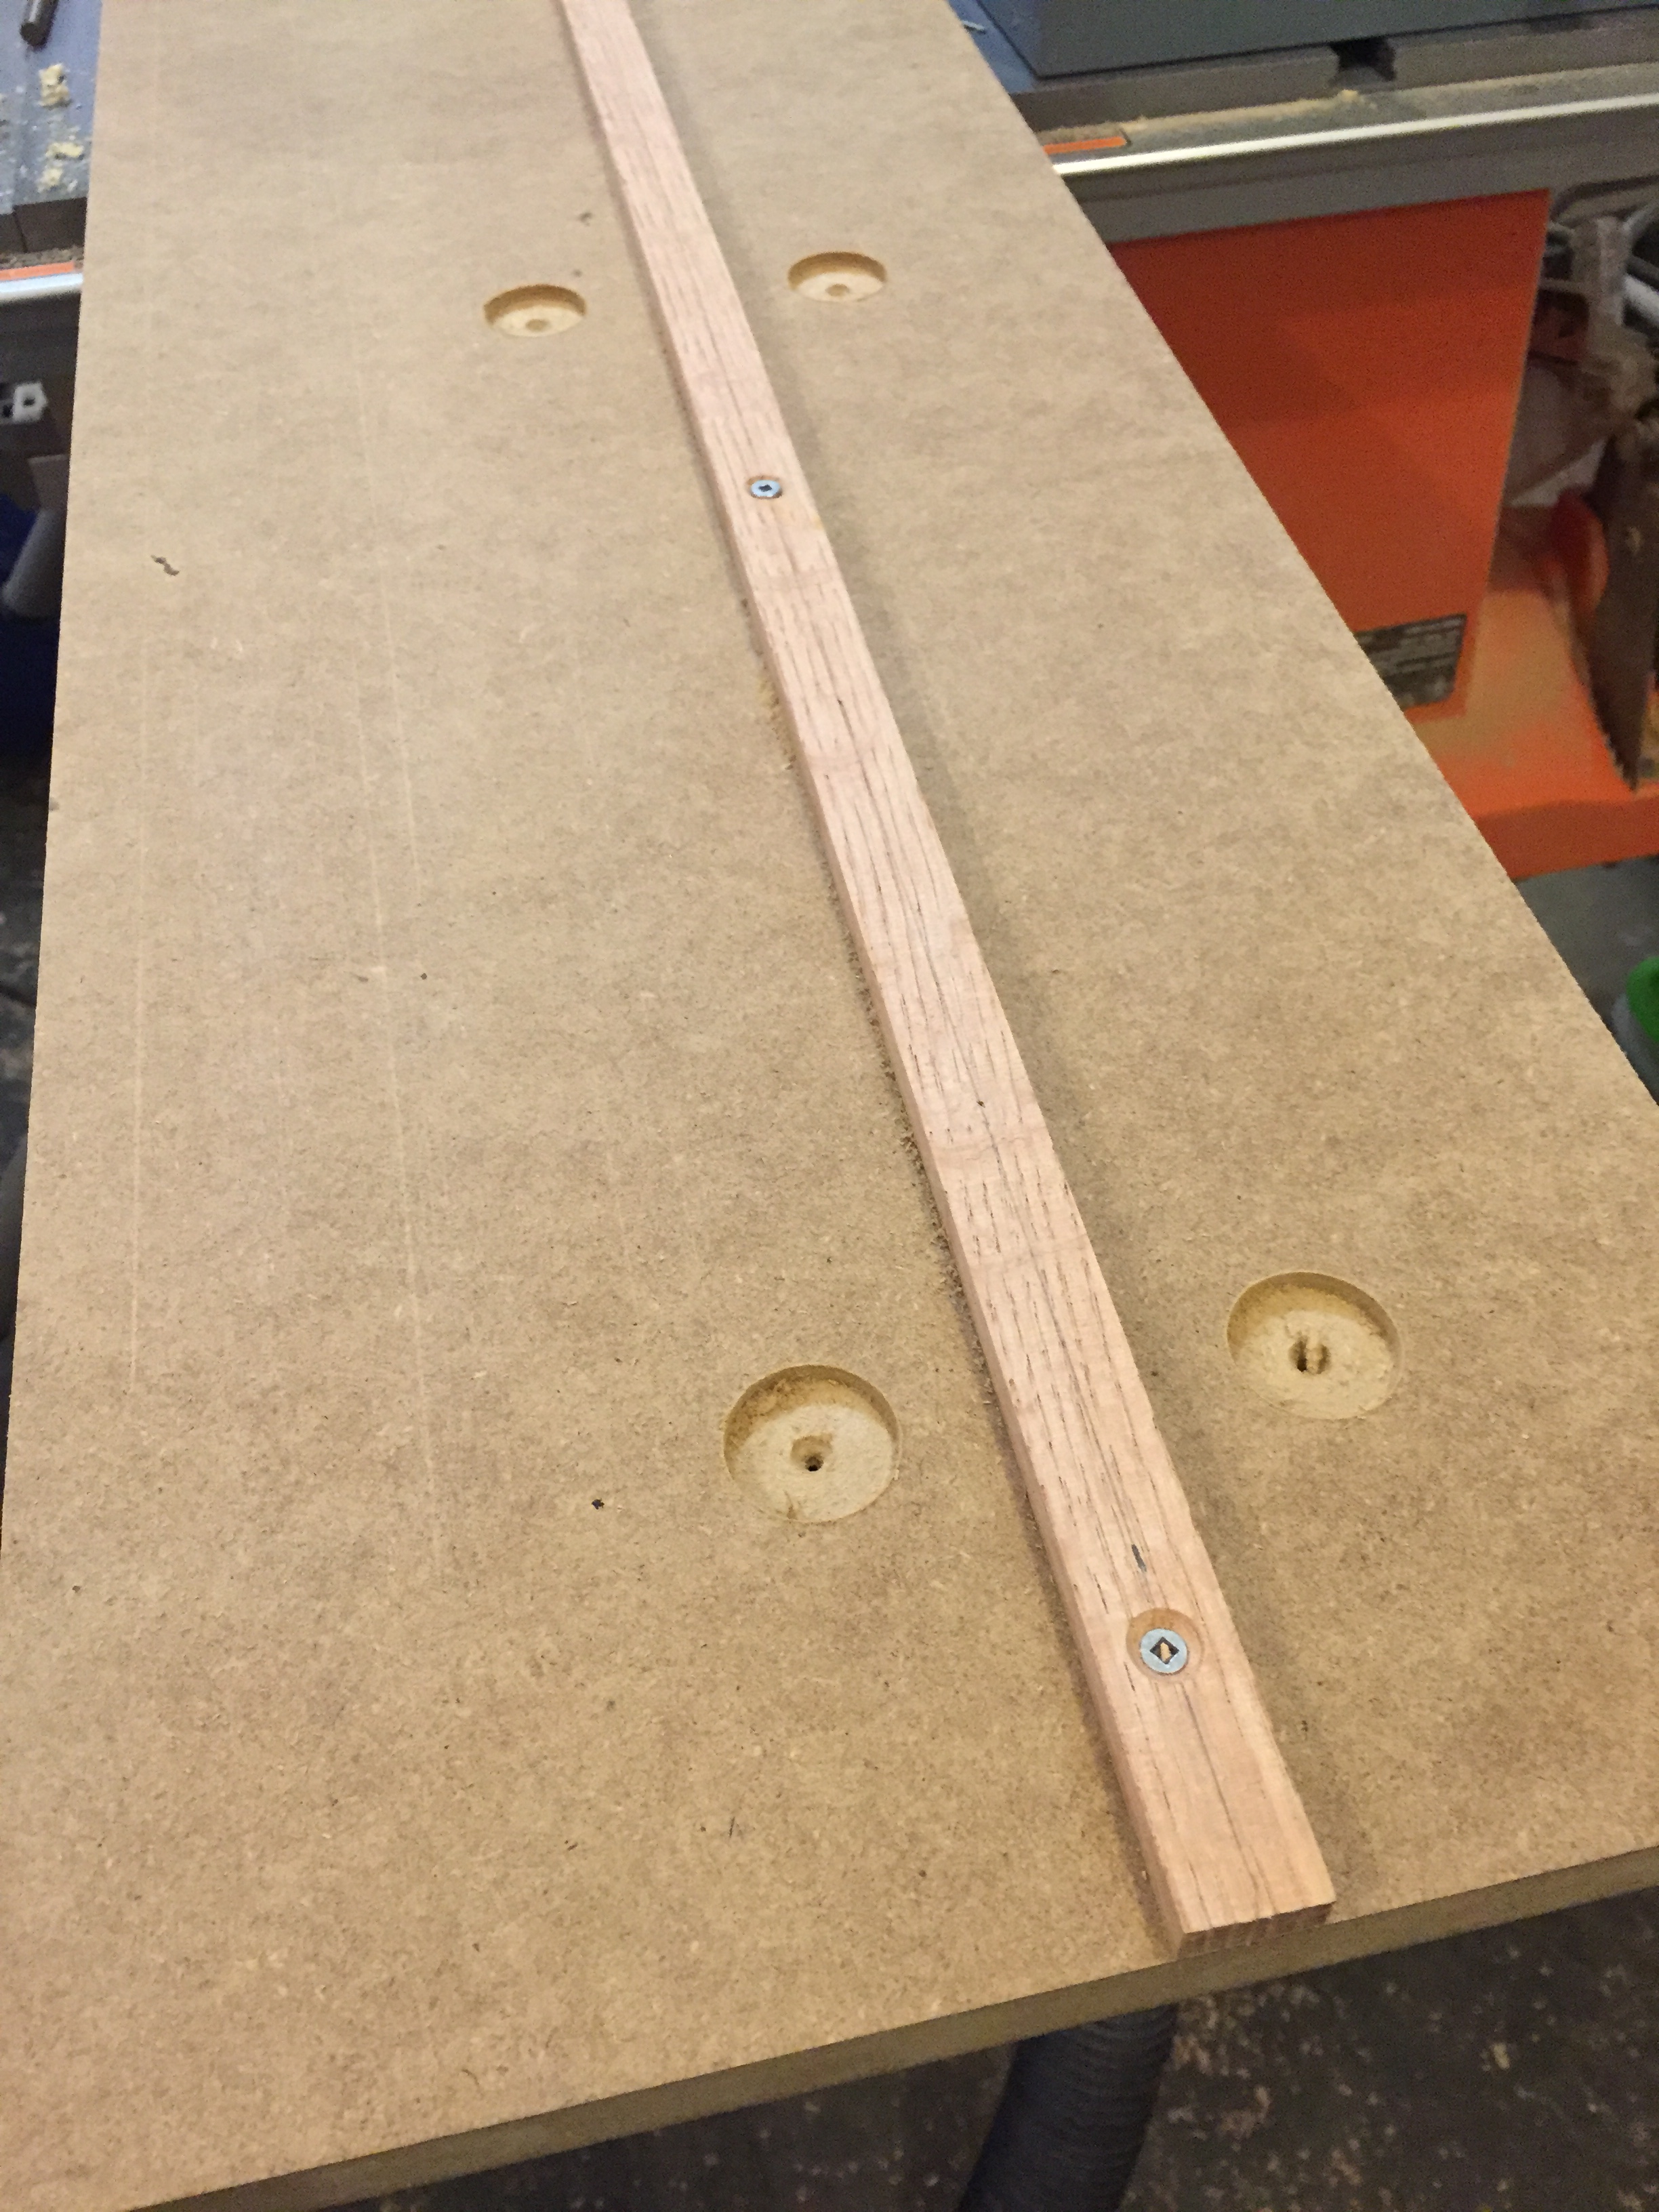
I then hammered the T-nuts into place ensuring that they didn’t protrude from the board

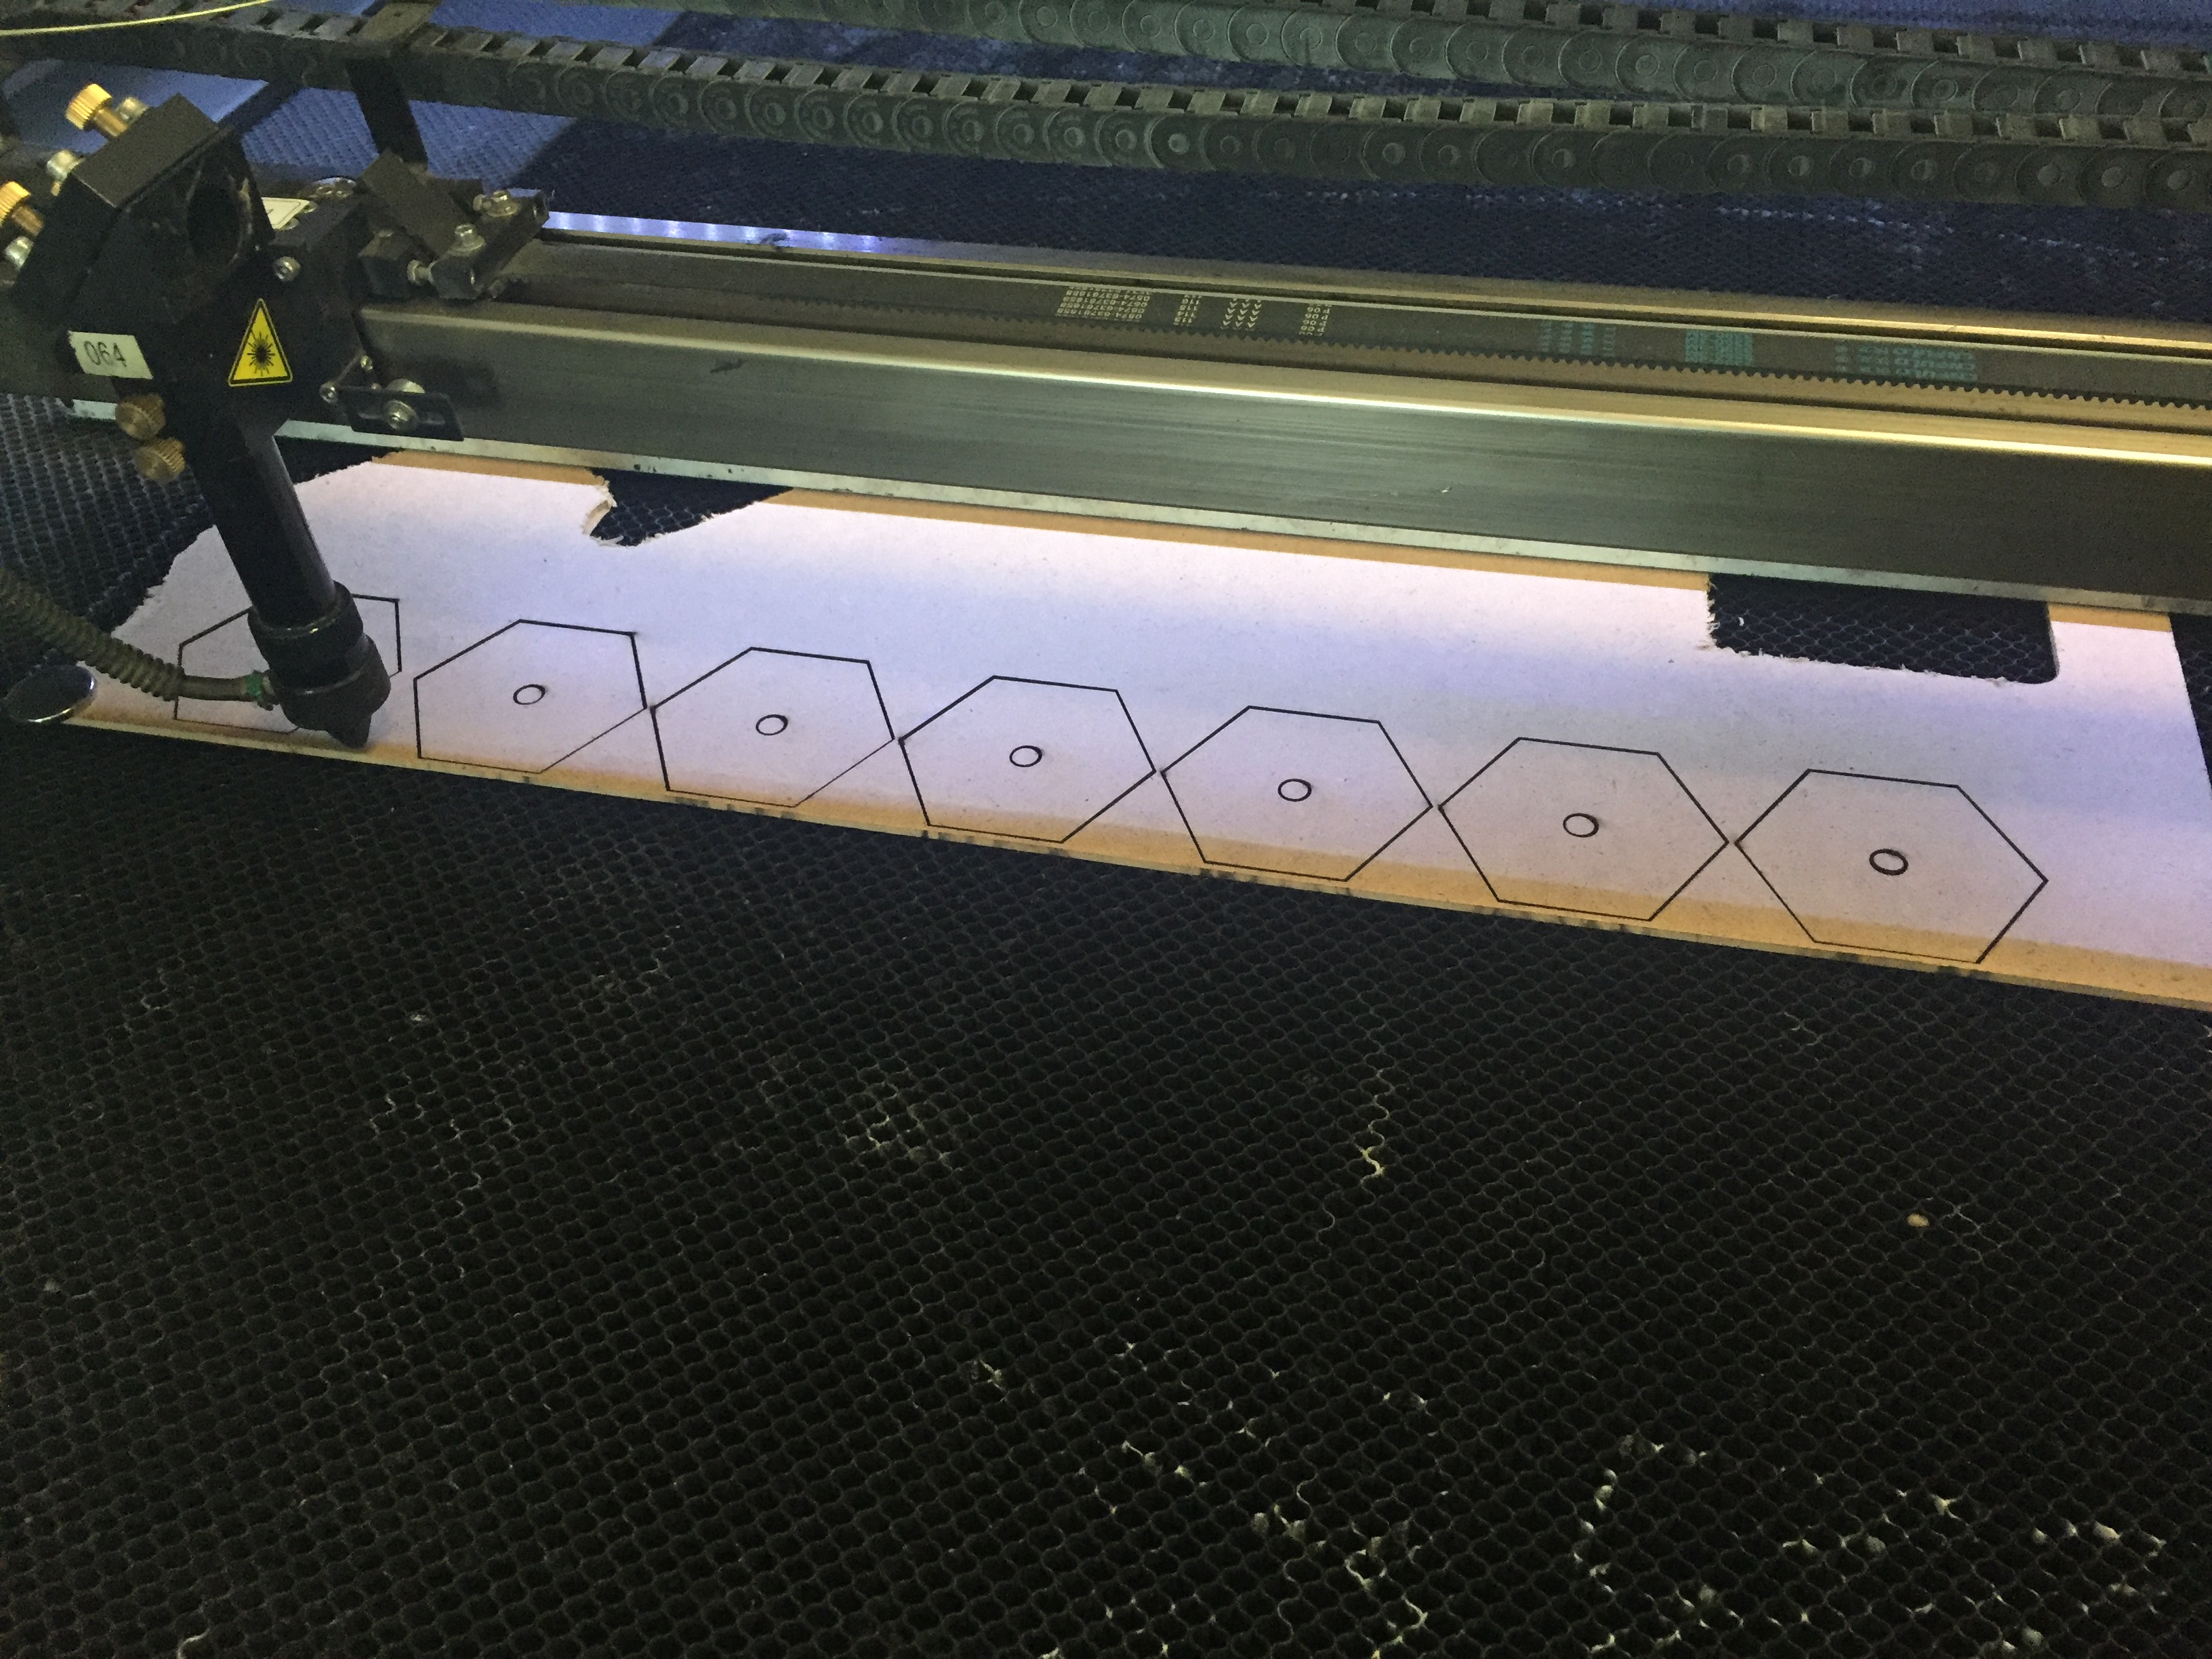
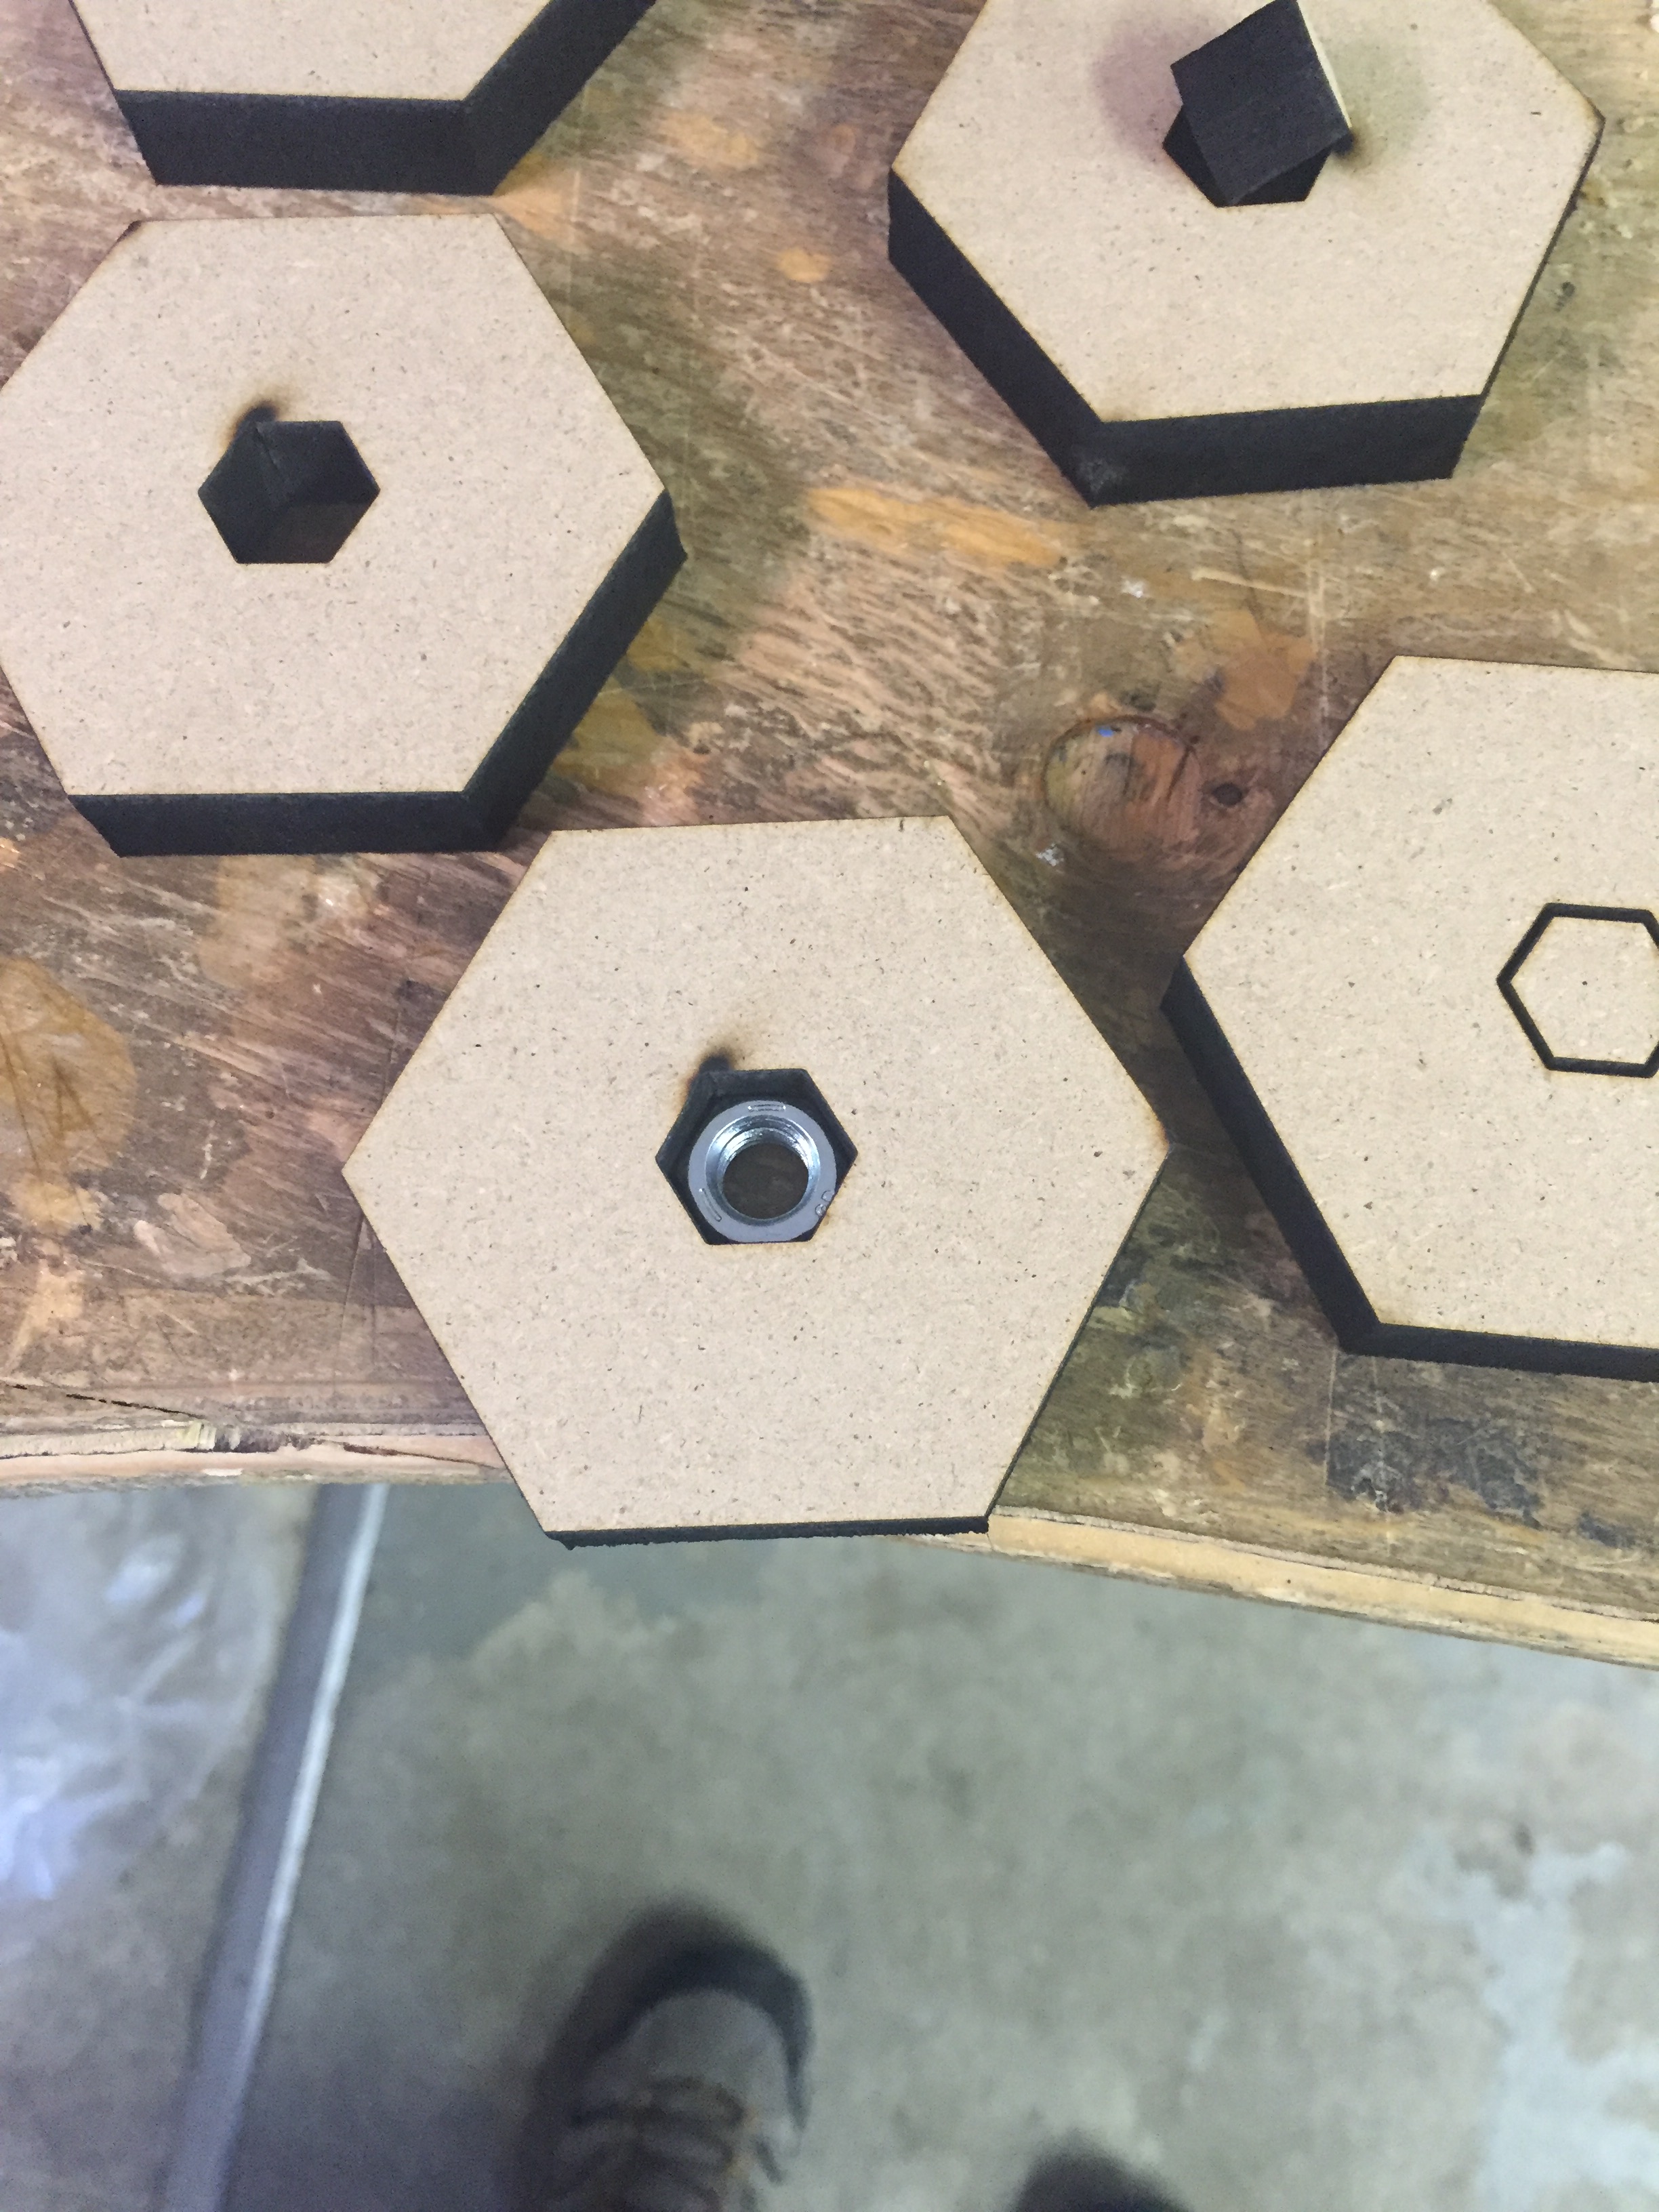
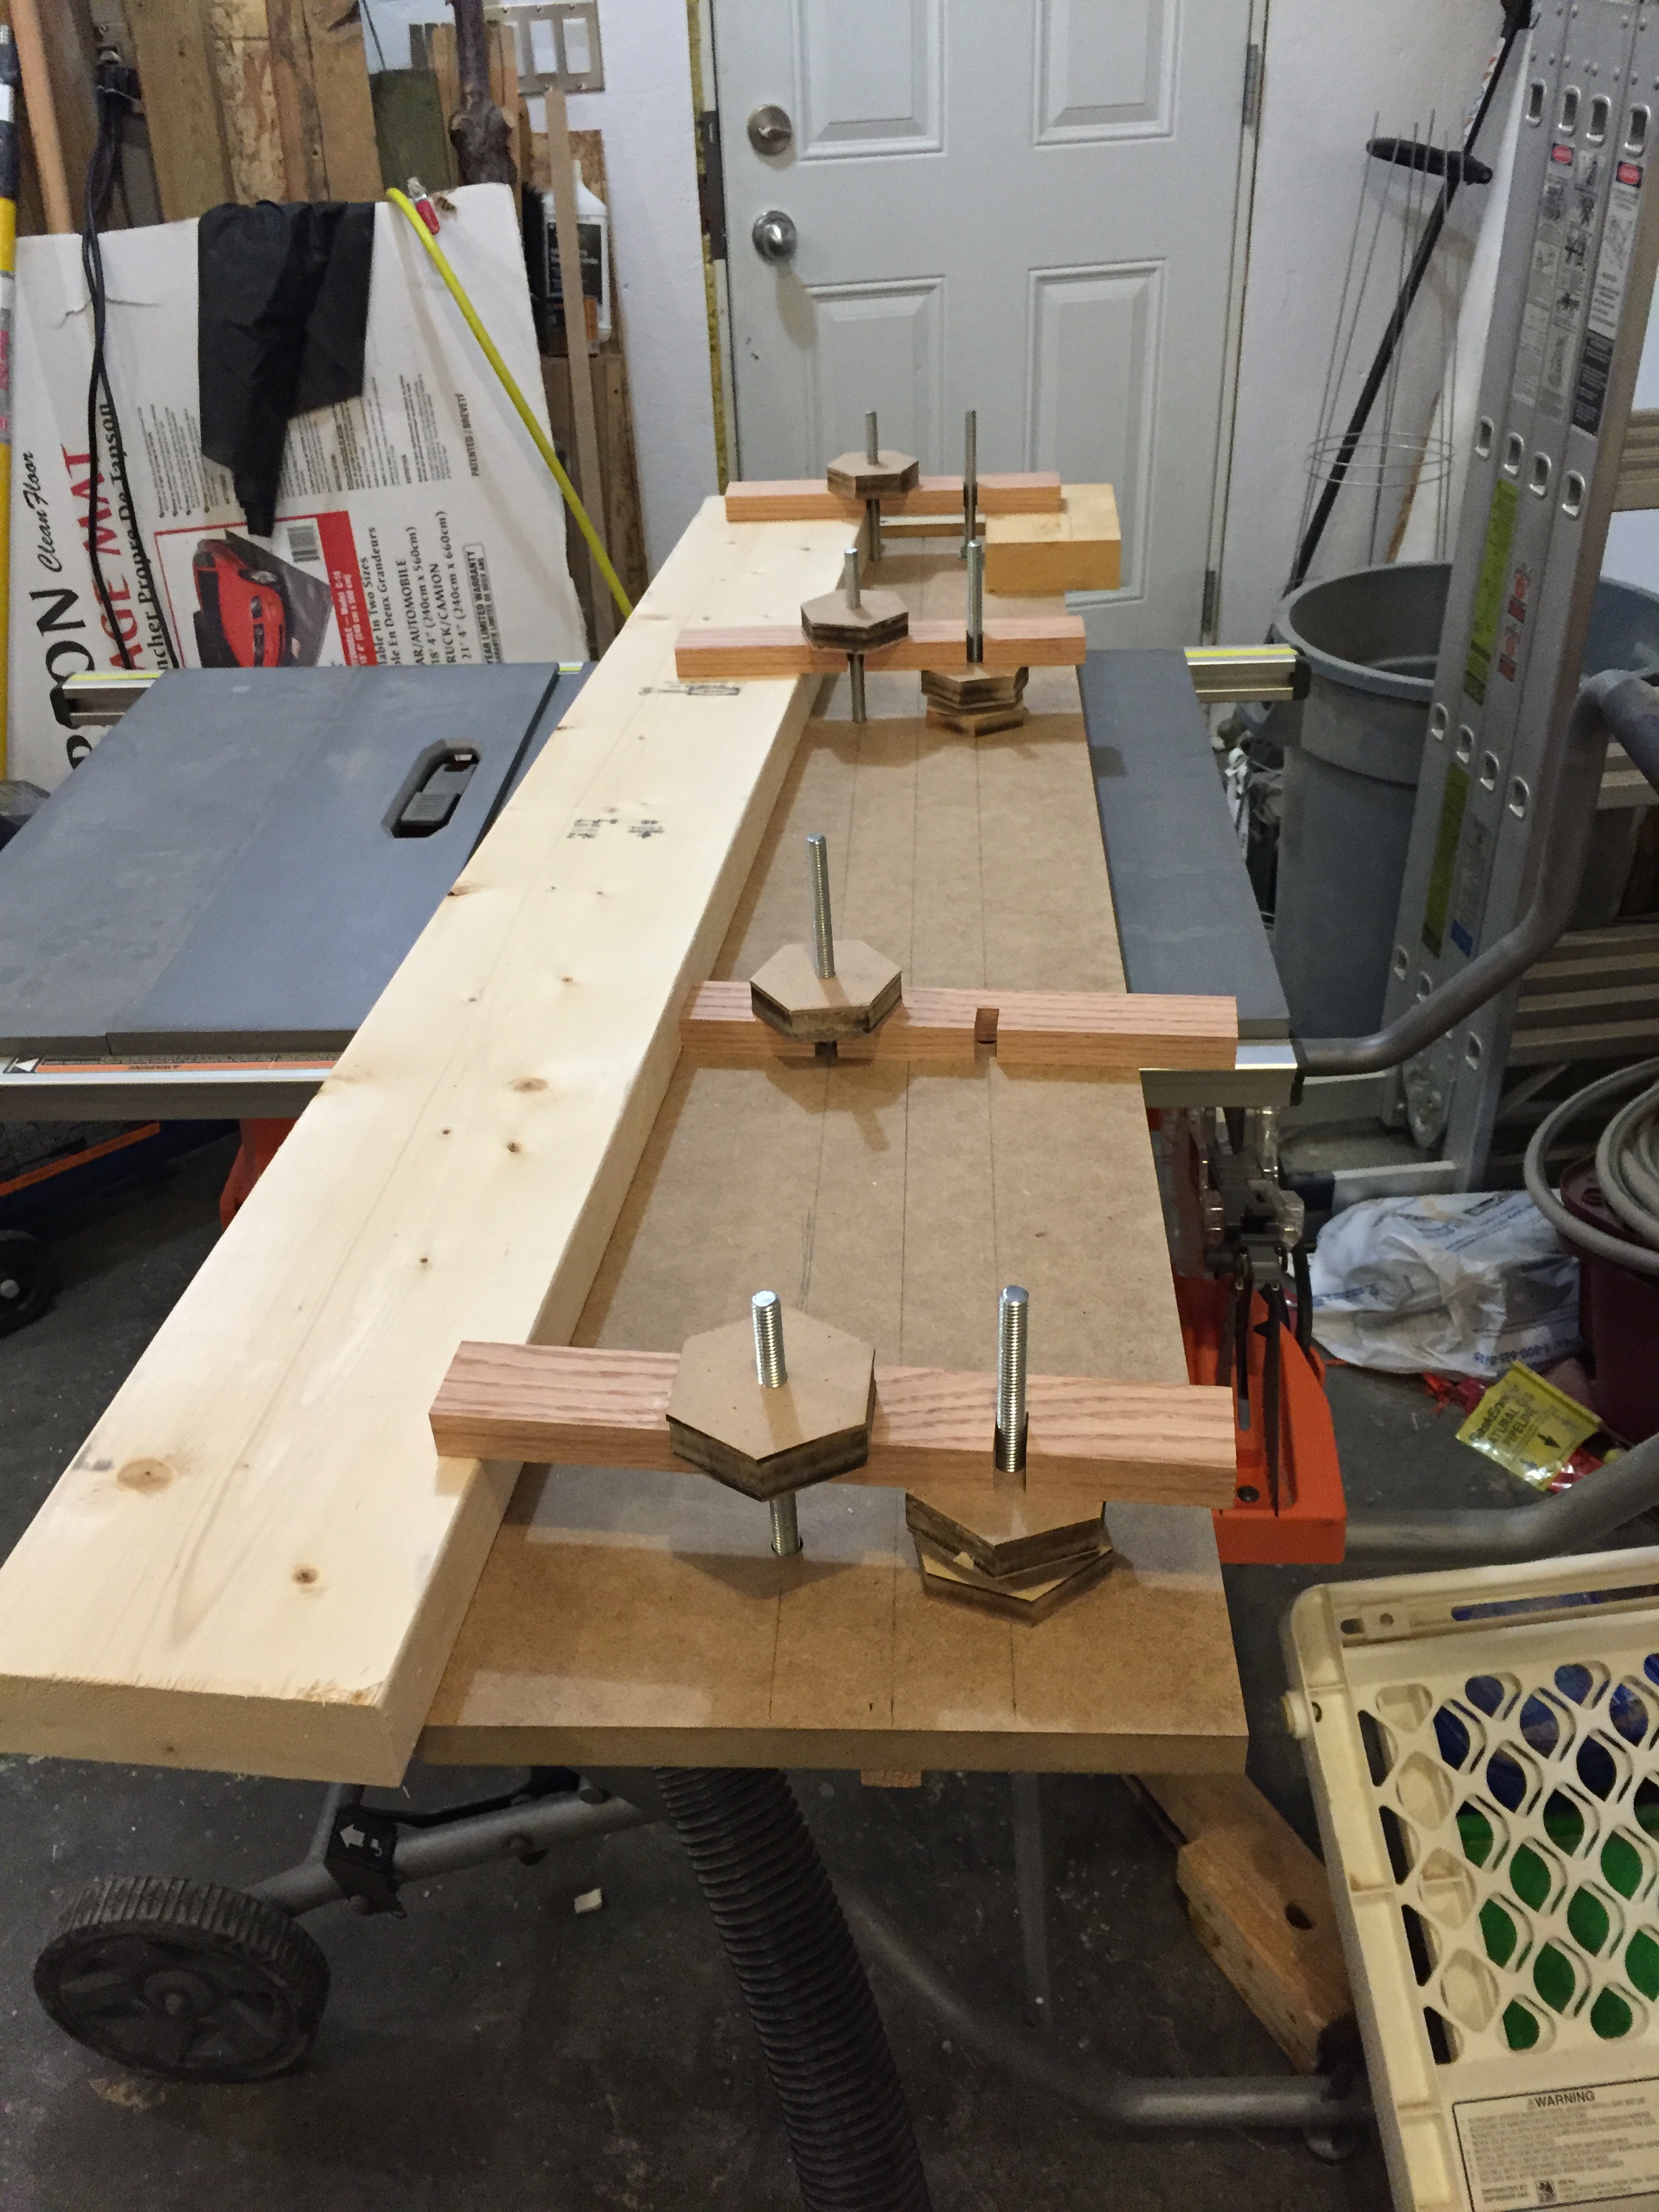
The next step of the process was getting all of the accessories prepared. I started by drawing up a CAD file of a 2-1/2″ hex with a hex hole in the center that would fit a standard 3/8 hex nut. Using the laser cutter at Techworks, I cut 10 of these hexes out of scrap 1/2″ MDF. I then designed an equally sized hex but with a hole in the center and cut 20 pieces out of 1/8″ MDF. I placed the a hex nut in the center of the 1/2″ and sandwiched this between 2 1/8″ hexes. I then glued and tacked these together. (sorry no close ups of the finished sandwich…mmm sandwich)

I then cut 5″ lengths of threaded rod taking care to smooth out the threads using a file. Next I cut 4 blocks of oak measuring ~3/4×1-1/2×11″. Using a sled I made out of scrap material and a dado blade, I cut slots into the oak pieces so they would fit around the threaded rod.

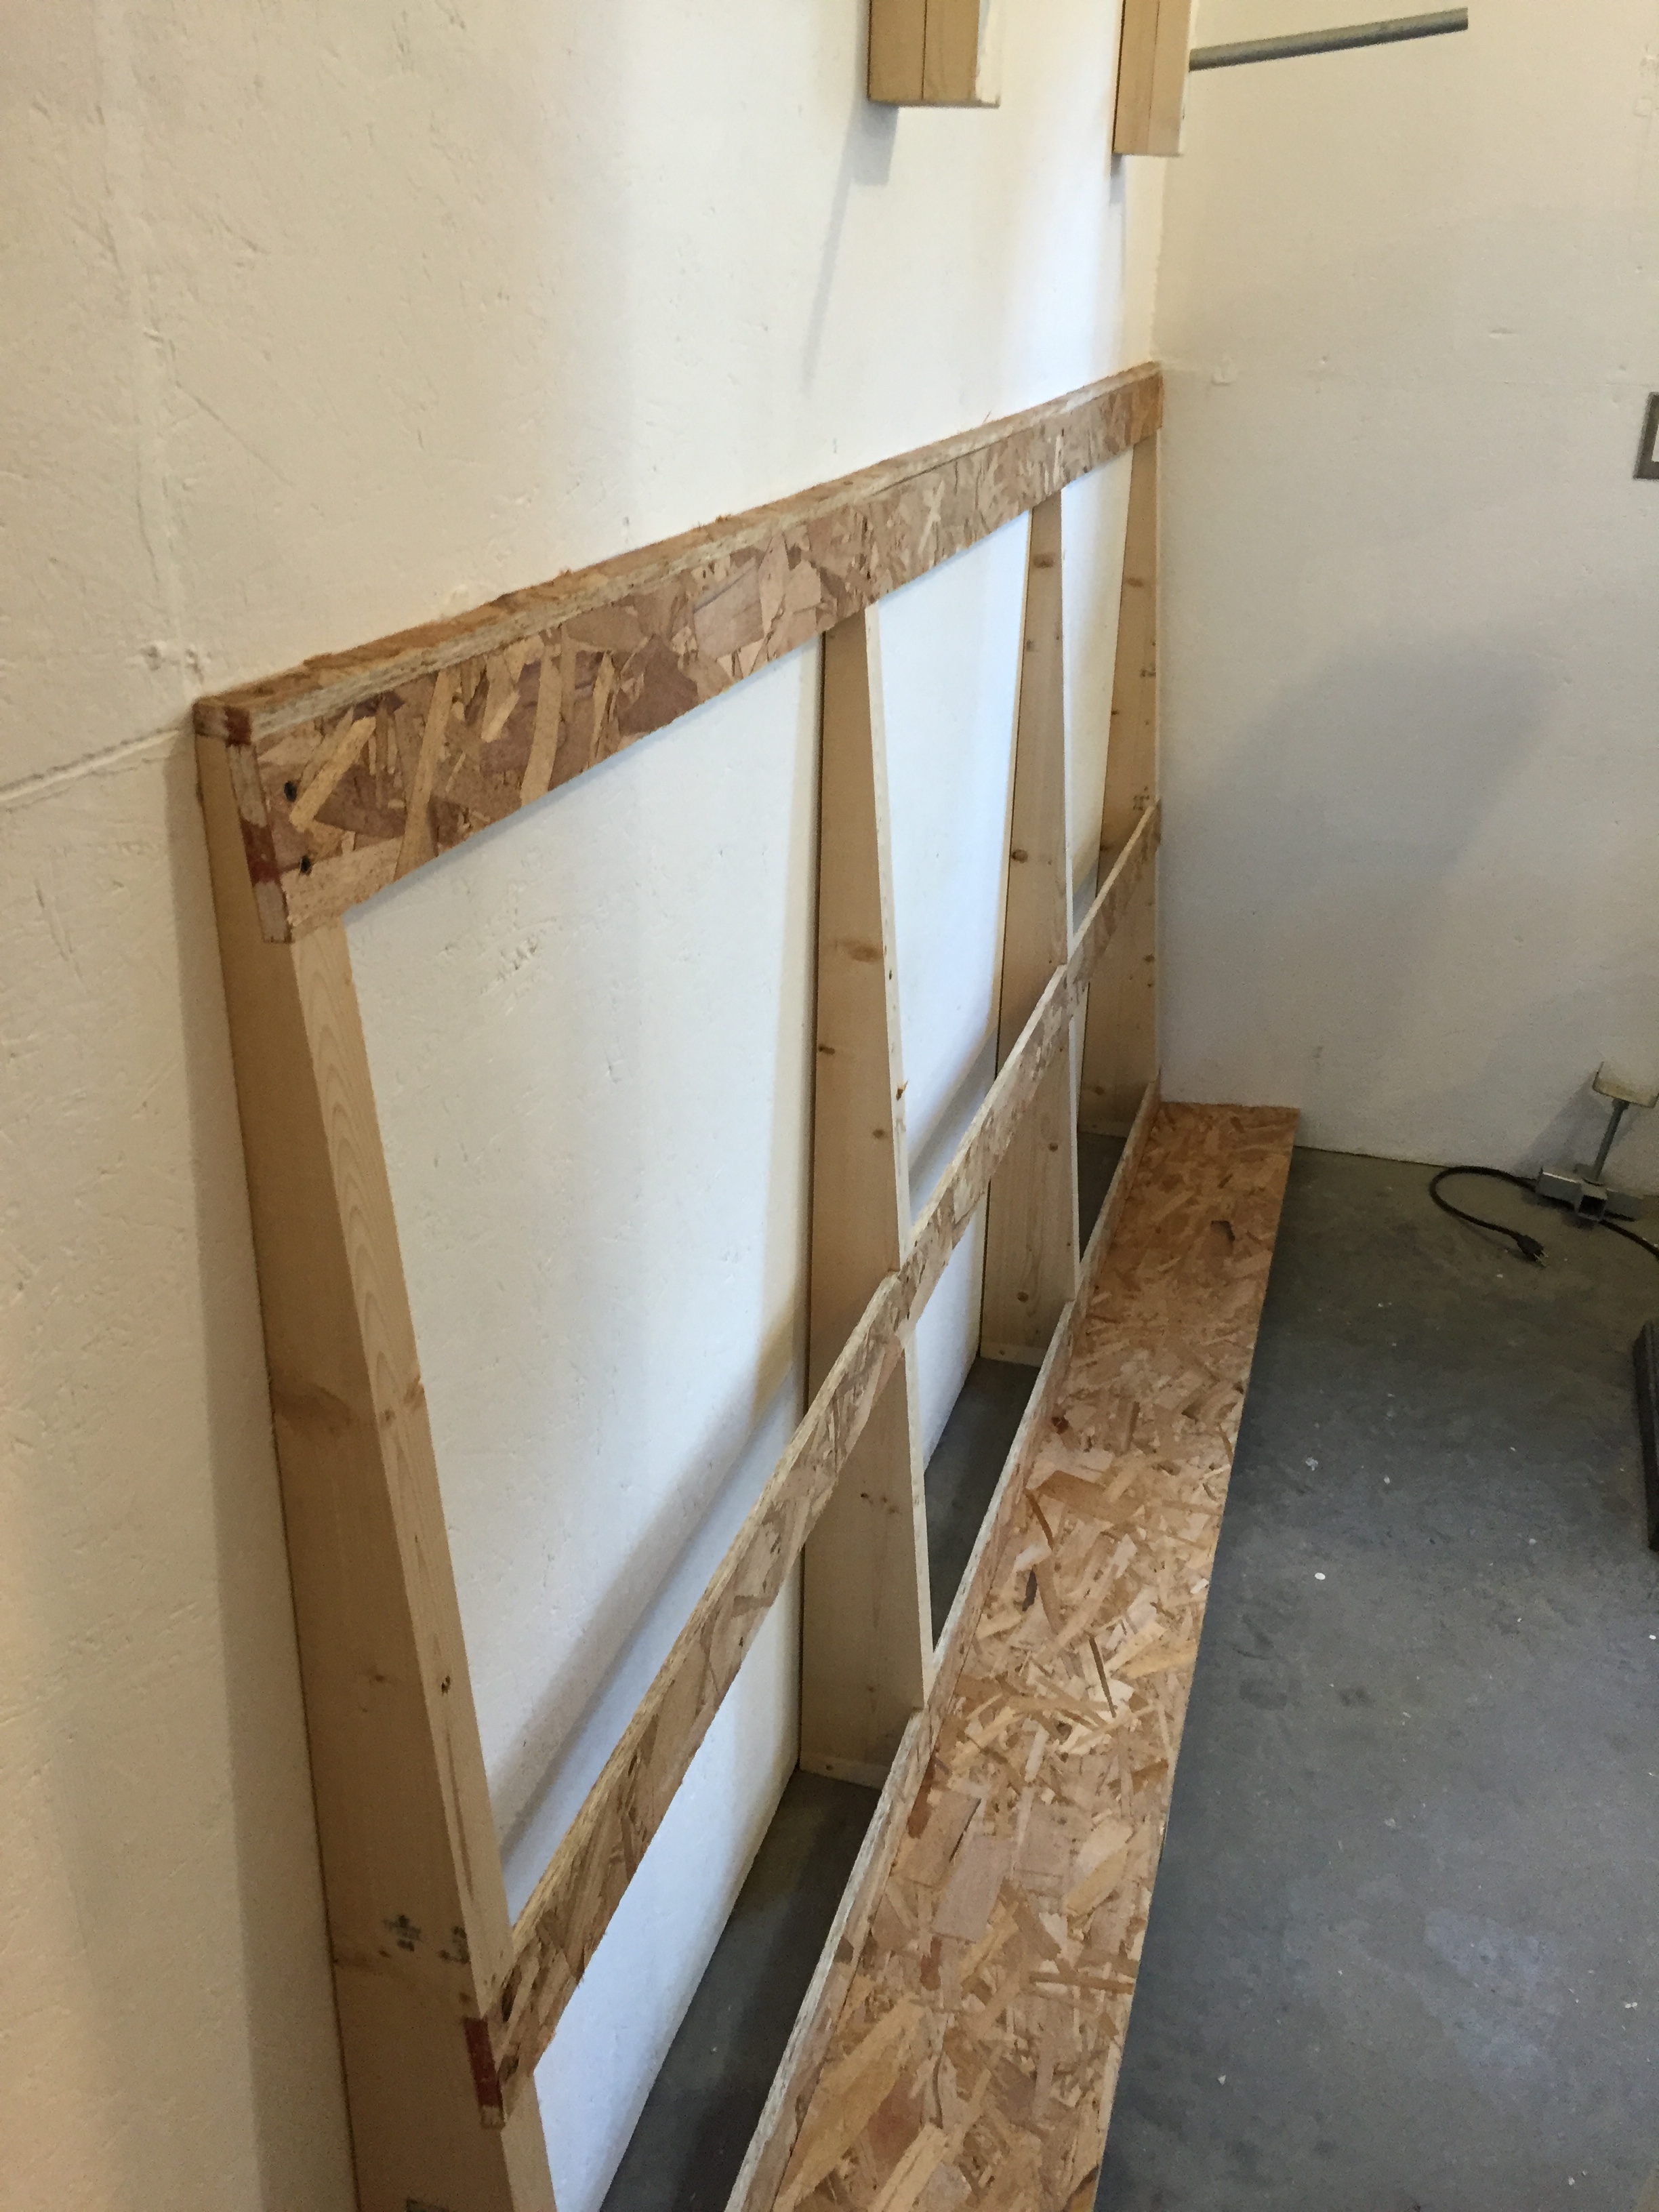
Finally I screwed a small piece of wood on the end of the jig to act as a stop and I was ready to start making my shelf.
Using the threaded rod and hex nuts, I was able to clamp the wood to the jig at a very shallow angle. I used one of the oak pieces as a stop to be able to reproduce the same cut on multiple 2×6 boards.
After a successful first cut, I proceeded to make 3 more of the exact same cuts.


And after all the trouble of making the jig, I was able to make my angled cuts in about 5 minutes. however it did make my cuts consistent and making the dado sled helped when making the dado cuts for my shelf. and the final product turned out quite nice.